A lush vertical garden doesn’t have to come with a hefty price tag. With a little creativity and some smart material choices, you can transform a bare wall, balcony, or fence into a thriving green display — all without breaking the bank.
Budget-friendly vertical gardens are ideal for small apartments, rental spaces, and homeowners looking to maximize their growing area without investing in expensive commercial systems. By using recycled or low-cost materials, you can create a setup that’s both beautiful and functional.
At Vertgar.com, we’ve also compiled 15 creative vertical garden ideas using recycled materials to help you stretch your budget even further and inspire your own DIY design.
 1")
Step 1: Choose the Right Location
 2")
The success of your vertical garden starts with its placement. Picking the right spot ensures your plants get the light, water, and protection they need — without adding unnecessary costs later.
Consider Sunlight
Most herbs, vegetables, and flowering plants need at least 6 hours of direct sunlight per day. South-facing walls or balconies usually provide the best exposure. For shadier spaces, choose plants that thrive in low-light conditions like ferns or certain leafy greens.
Protect from Wind
Strong winds can quickly dry out soil and damage delicate leaves. If you’re gardening on a balcony or rooftop, choose a spot that’s shielded by walls, screens, or taller plants.
Ensure Easy Access to Water
The closer your garden is to a water source, the easier (and cheaper) it will be to maintain. Positioning it near a hose bib, rain barrel, or even a kitchen sink window can save time and reduce the need for extra equipment.
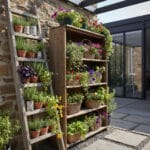
Tip: If you’re in a rental property, freestanding frames and railing planters allow you to create a garden without drilling into walls — perfect for keeping your deposit safe.
Step 2: Select an Affordable Frame or Structure
Your frame is the backbone of your vertical garden, and choosing the right one can make the difference between an expensive project and a budget-friendly success. Fortunately, many effective options can be sourced for little to no cost.
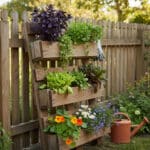
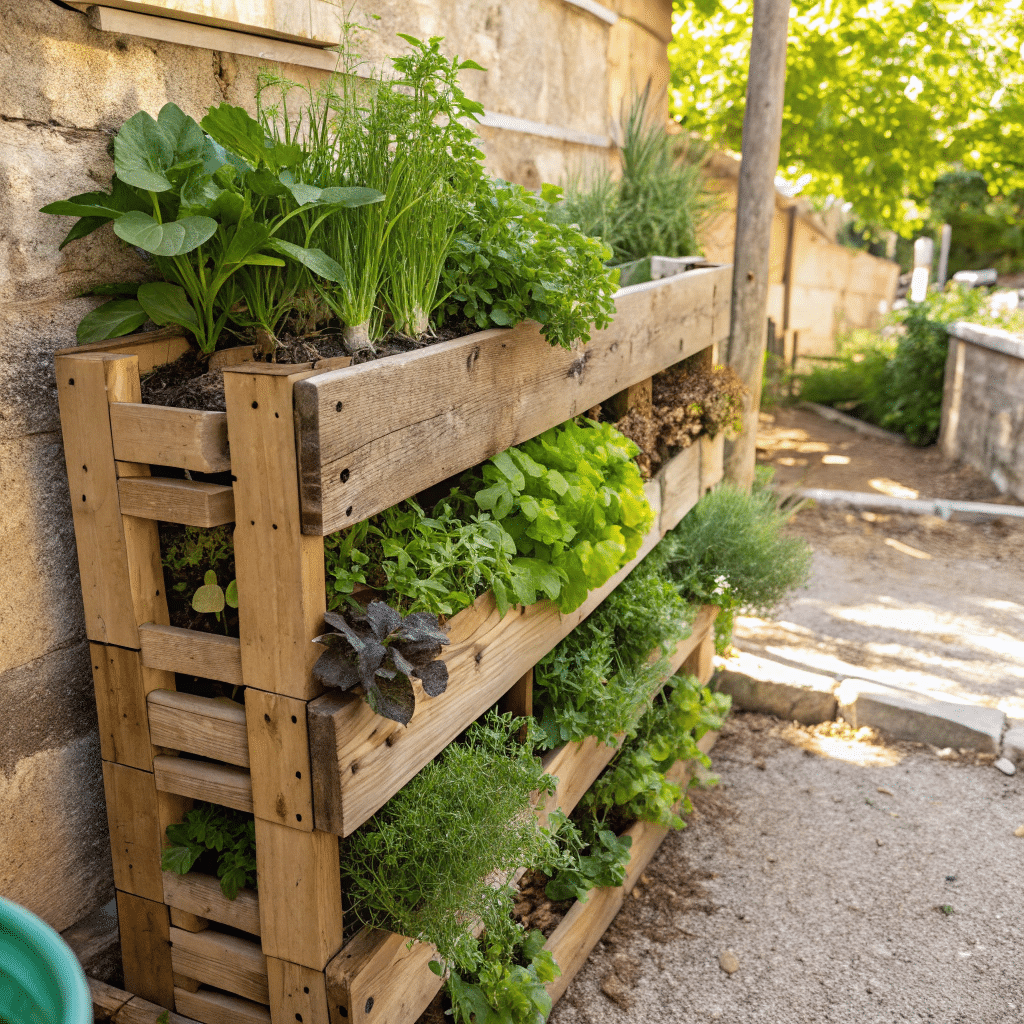
Wooden Pallets
One of the most popular and affordable choices, wooden pallets can often be found for free at warehouses, hardware stores, or construction sites. With a little preparation — sanding, sealing, and adding planting pockets — they make a sturdy and stylish garden frame. For a complete walkthrough, see our pallet vertical garden guide at Vertgar.com, which covers safe pallet selection and planting tips.
Metal Grid Panels
Repurposed shelving grids or fencing panels are lightweight, durable, and easy to customize. They’re great for hanging pots or training climbing plants.
Fabric Organizers
Over-the-door shoe organizers or fabric wall pockets are perfect for small, lightweight plants like herbs or strawberries. They’re inexpensive, easy to hang, and simple to replace if worn out.
Budget Tip: Before buying anything new, check local classifieds, community boards, or recycling centers — you might find the perfect frame for free.
Step 3: Prepare and Protect the Frame
A little preparation goes a long way in extending the life of your vertical garden and avoiding costly replacements down the road. Whether you’ve chosen wood, metal, or fabric, proper treatment will keep your structure strong and safe for plants.
For Wooden Frames
- Sand the surface to remove splinters and rough edges.
- Seal with a non-toxic wood preservative to protect against moisture, pests, and rot. This is especially important for outdoor gardens exposed to rain.
For Metal Frames
- Clean thoroughly to remove dirt or rust.
- Apply a rust-resistant spray paint to prevent corrosion and add a decorative finish.
For Fabric Organizers
- Ensure the fabric is breathable and washable.
- Add small drainage holes at the bottom of each pocket to prevent water buildup and root rot.
Pro Tip: Always check the weight capacity of your frame before planting — an overloaded structure can warp, tear, or collapse.
Step 4: Choose Budget-Friendly Plants
Selecting the right plants is key to keeping your vertical garden affordable, productive, and low-maintenance. By choosing varieties that are easy to grow and adapt well to vertical conditions, you’ll save money on replacements and care.
Herbs
Basil, mint, parsley, thyme, and oregano are perfect for vertical gardens. They thrive in shallow containers, grow quickly, and can be harvested repeatedly.
Leafy Greens
Lettuce, spinach, and arugula are low-cost, fast-growing crops that provide multiple harvests from a single planting.
Compact Vegetables
Cherry tomatoes, peppers, and bush beans can produce impressive yields in limited space when given proper support.
Ornamental Flowers
Marigolds, nasturtiums, and pansies add color while being inexpensive and easy to grow. Some even repel pests naturally.
Budget Tip: Swap seeds or cuttings with friends, join local gardening groups, or save seeds from your own harvests to avoid buying new plants every season.
Step 5: Use Low-Cost Containers and Soil
 3")
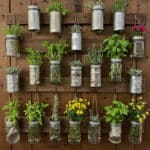
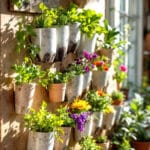
You don’t need expensive planters to create a thriving vertical garden. Many household items and discarded materials can be repurposed into perfectly functional planting containers.
Upcycled Container Ideas
 4")
- Plastic bottles cut in half and mounted horizontally or vertically.
- Old food tubs with drainage holes drilled at the bottom.
- Wooden crates lined with landscape fabric to hold soil.
- Tin cans cleaned, painted, and hung on hooks or wires.
Affordable Soil Solutions
Buying pre-mixed potting soil for an entire vertical garden can get pricey. Instead:
- Blend homemade compost with coco coir or peat moss for improved drainage.
- Add perlite or coarse sand to prevent waterlogging in vertical pockets.
- Use leaf mold or well-rotted manure to enrich the mix naturally.
Pro Tip: Avoid using regular garden soil in containers — it’s too heavy, compacts easily, and can restrict root growth.
Step 6: Install a Simple Watering System
One of the biggest challenges in vertical gardening is keeping plants consistently hydrated — especially on a budget. Since water drains down quickly through stacked planters, an efficient watering method will save you time, reduce waste, and keep your plants healthy.
DIY Drip Irrigation
Repurpose plastic bottles by piercing small holes in their caps, filling them with water, and placing them upside-down in the soil near plant roots. This allows slow, steady watering without constant attention.
Recycled Soaker Hoses
Old garden hoses can be turned into soaker systems by puncturing small holes along their length and weaving them through your vertical garden.
Self-Watering Planters
Use double-container setups — one pot with drainage holes nested inside another without — to store extra water and reduce watering frequency.
Pro Tip: Water from the top early in the morning so gravity helps distribute moisture evenly through all levels of your garden.
Step 7: Arrange and Plant
The way you position your plants in a vertical garden affects not only its appearance but also how well the plants grow. Strategic placement ensures that each variety gets the right amount of sunlight, water, and space.
Plan for Sunlight and Water Flow
- Place sun-loving plants like tomatoes, peppers, and basil near the top, where they get the most light.
- Position shade-tolerant plants like lettuce, parsley, or ferns near the bottom.
- Group thirsty plants lower down so they can take advantage of water runoff from higher levels.
Use Trailing Plants for Visual Impact
Add trailing flowers like nasturtiums or creeping herbs like thyme to soften edges and fill gaps, creating a lush, full look.
Avoid Overcrowding
Crowding can block sunlight and restrict airflow, increasing the risk of disease. Leave enough room between plants for growth and maintenance.
Pro Tip: Arrange plants in patterns or color blocks to make your vertical garden visually appealing as well as functional.
Step 8: Maintain on a Budget
Keeping your vertical garden thriving doesn’t have to mean spending more money. With a few resourceful habits, you can maintain healthy plants while minimizing costs.
Make Your Own Fertilizer
- Use kitchen scraps like coffee grounds, crushed eggshells, and banana peels as natural plant food.
- Brew compost tea for a nutrient-rich liquid boost.
Save Water
- Collect rainwater in buckets or barrels to use for irrigation.
- Reuse water from rinsing fruits and vegetables, as long as it’s chemical-free.
Propagate Plants
- Take cuttings from herbs and flowering plants to grow new ones for free.
- Divide mature plants like mint or strawberries to expand your garden.
Pest Control Without the Price Tag
- Spray a simple soap-and-water solution to deter aphids.
- Encourage beneficial insects like ladybugs to keep pests in check naturally.
Pro Tip: Regularly inspect plants for signs of stress or pests so you can take action early — prevention is always cheaper than cure.
Conclusion
Building a vertical garden on a budget is all about creativity, resourcefulness, and choosing the right plants and materials. With a little planning, you can transform a blank wall, balcony, or fence into a thriving green display without spending a fortune.
By using recycled materials, selecting low-maintenance plants, and installing simple watering systems, you’ll create a garden that is not only beautiful but also sustainable. Plus, the compact design of vertical gardens makes them perfect for small spaces, from apartment balconies to cozy backyards.
If you’re ready to take your project further, explore our living wall projects for larger-scale designs or read the beginner’s guide to vertical gardening to master the basics before expanding your setup. With the right approach, your vertical garden will reward you with fresh herbs, vegetables, and flowers — all while keeping your costs low.
Frequently Asked Questions
1. How to make a simple vertical garden?
Start with an easy-to-find frame, such as a wooden pallet or fabric shoe organizer. Add containers or planting pockets, fill them with a lightweight, well-draining soil mix, and choose plants suited to your light conditions.
2. What is the cheapest way to make a garden?
Reuse recycled materials — pallets, bottles, crates, or old ladders — and grow low-maintenance plants like herbs and lettuce that don’t require expensive care.
3. What are the disadvantages of vertical gardens?
They can dry out faster than traditional gardens, may need more frequent watering, and heavy plants require strong structural support. Maintenance can also be slightly more frequent to keep plants looking healthy.
4. How much does it cost to install a vertical garden?
DIY versions can cost as little as $20–$50 using reclaimed materials, while professional installations can range from $500 to several thousand dollars depending on size and complexity.
5. What materials do you need for a vertical garden?
A frame or structure, containers or planting pockets, lightweight soil, plants, and a watering system. Optional items include trellises or supports for climbing plants.
6. What is a vertical garden called?
It’s often referred to as a living wall or green wall, depending on the style and scale of the installation.