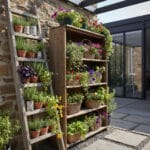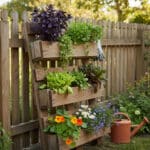
Pallet vertical gardens have become one of the most popular DIY solutions for urban gardeners and eco-conscious homeowners. Not only are pallets affordable and widely available, but they also offer a rustic charm while maximizing small spaces. With just a few tools, some creativity, and the right plant selection, you can transform an old wooden pallet into a thriving wall of greenery.
This guide will walk you through everything you need to know — from choosing safe pallets and essential tools, to selecting the best soil and plants for your setup. Whether you want to grow herbs, flowers, or vegetables, a pallet garden is a cost-effective way to add vertical greenery to your balcony, patio, or backyard.
🔗 If you’re completely new to vertical gardening, you might also like our Beginner’s Guide to Vertical Gardening: From Planning to Planting, which explains the basics before diving into pallet projects.
Choosing the Right Pallet for Gardening

Not all pallets are created equal. Since you’ll be planting edible herbs or vegetables, it’s crucial to choose a pallet that’s safe, durable, and free from harmful chemicals.
How to Identify Safe Pallets
- Look for the HT stamp: Pallets marked with HT (Heat Treated) are safe for gardening. They’ve been treated with heat rather than chemicals.
- Avoid MB pallets: If you see MB (Methyl Bromide), do not use it. These pallets are chemically treated and unsafe for plants.
- Check condition: Choose pallets that are sturdy, free from rot, and without large cracks.
Preparing the Pallet for Gardening
- Sand the wood to prevent splinters.
- Apply a natural, non-toxic sealant to increase durability against weather.
- Inspect nails and remove or hammer down any protruding ones.
Pro Tip
If you want a rustic yet modern look, you can stain the pallet with eco-friendly wood stain before planting.
And if you’re looking for more ways to create a lush garden without spending much, our detailed guide on building a vertical garden on a budget explores several low-cost ideas, including recycled pallets, bottles, and crates.
Essential Tools and Materials Needed

Before you begin building your pallet vertical garden, gather all the tools and supplies you’ll need. Having everything on hand will make the process smoother and more enjoyable.
Basic Tools
- Hammer and nails or a drill with screws – for reinforcing the pallet.
- Sandpaper or an electric sander – to smooth rough surfaces.
- Staple gun – useful for attaching landscape fabric.
- Measuring tape – to ensure accurate spacing for pots or plants.
Materials
- Landscape fabric or geotextile cloth – keeps soil in place while allowing drainage.
- Potting soil – choose a lightweight mix suitable for container gardening.
- Plastic liner (optional) – helps prevent water damage if your pallet rests against a wall.
- Non-toxic wood sealant – extends the life of the pallet outdoors.
Planting Supplies
- Seeds or seedlings of your chosen plants.
- Fertilizer (preferably organic) to keep plants thriving.
- Small pots or containers if you plan to insert them into the pallet slots.
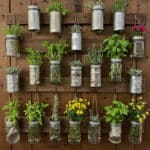
💡 Tip: Many of these materials can be reused or repurposed from previous projects. If you’re curious about other creative ways to recycle for gardening, check out our collection of DIY vertical garden ideas using recycled materials.
Step-by-Step Guide to Building Your Pallet Garden
Now that you have your pallet and tools ready, it’s time to assemble your vertical garden. This process is simple and beginner-friendly, but attention to detail will ensure your garden lasts.
Step 1: Prepare the Pallet
- Sand the entire surface to remove rough edges and splinters.
- Apply a coat of non-toxic sealant to protect the wood from moisture.
Step 2: Attach the Backing
- Use landscape fabric or geotextile cloth to cover the back and sides of the pallet.
- Secure it with a staple gun, ensuring no soil will leak through.
Step 3: Position the Pallet
- Decide whether your pallet will lean against a wall, be freestanding, or hang.
- If leaning, consider adding a plastic liner to protect the wall.
Step 4: Add Soil
- Turn the pallet flat on the ground.
- Fill the interior sections with lightweight potting soil, packing it down gently.
Step 5: Plant Your Greenery
- Insert seeds or seedlings into the gaps or attached pots.
- Choose herbs, flowers, or vegetables based on your available sunlight.
Step 6: Let the Roots Establish
- Keep the pallet horizontal for about 1–2 weeks.
- This allows roots to secure themselves in the soil before the pallet is placed upright.
🌱 If you want more inspiration for arranging your plants, our living wall projects guide shows different ways to design your vertical green space for maximum impact.
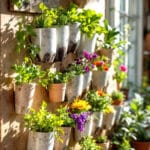
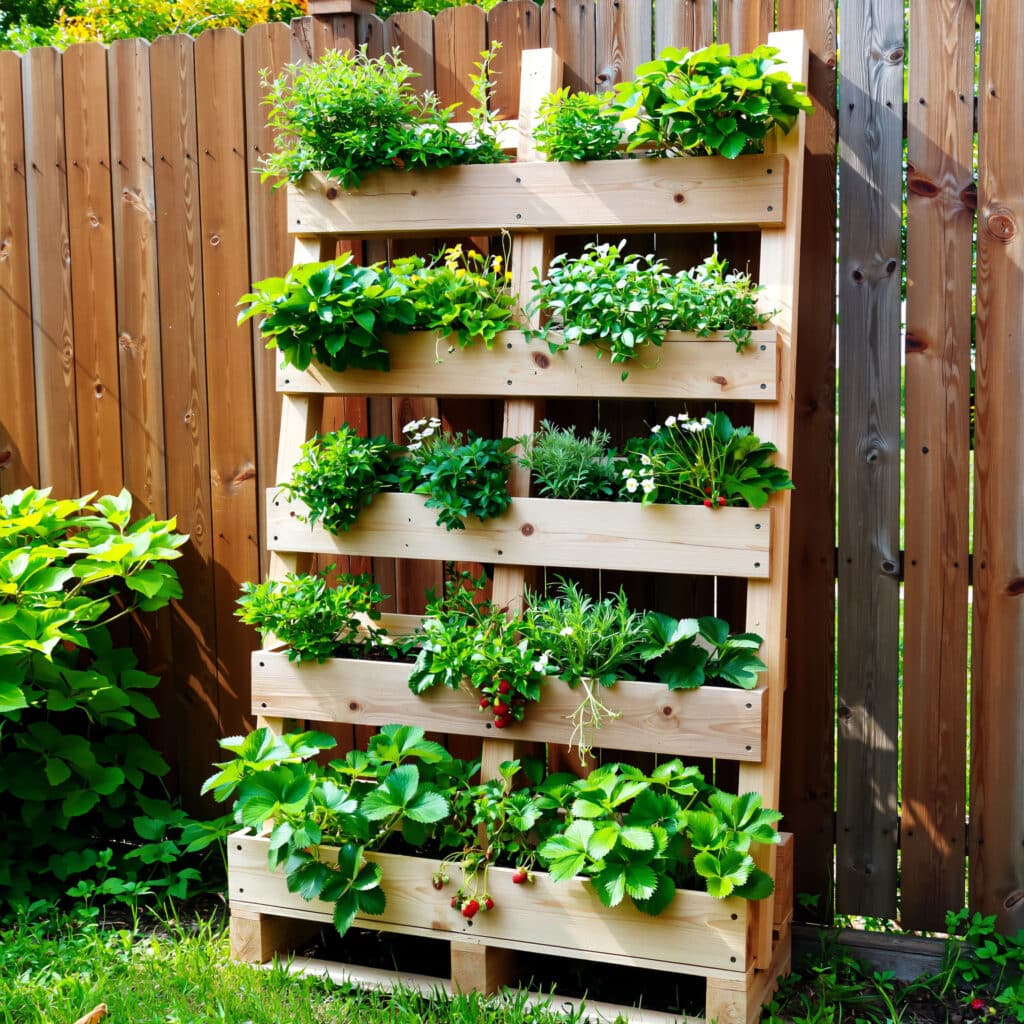
Best Plants for a Pallet Vertical Garden

Choosing the right plants is the key to success with pallet gardening. Since space is limited and soil depth is shallow, you’ll want plants that thrive in compact conditions and don’t require deep roots.
Top Herbs for Pallet Gardens
- Basil, parsley, and cilantro – easy to grow, compact, and ideal for kitchen use.
- Mint – grows well but should be contained to prevent spreading too much.
- Thyme and oregano – low-maintenance herbs that thrive in small spaces.
Vegetables That Work Well
- Lettuce and spinach – shallow-rooted greens perfect for narrow soil pockets.
- Radishes – quick growers that don’t require deep soil.
- Strawberries – add beauty and provide delicious fruit in hanging slots.
Flowers and Ornamentals
- Petunias and pansies – vibrant flowers that spill beautifully over pallet edges.
- Succulents – require little water and adapt perfectly to vertical gardens.
- Marigolds – add color and repel pests naturally.
Pro Tip
Mix edible herbs with trailing flowers to create both a functional and decorative garden wall.
Many of these plant choices also appear in larger setups, as explained in our guide on growing vegetables in a vertical garden, where shallow-rooted crops and compact herbs are highlighted as the most successful options.
Watering, Maintenance, and Care Tips

A pallet vertical garden has limited soil volume, which means plants dry out faster than in traditional beds. Consistent watering and light maintenance are essential for long-term success.
Watering Tips
- Drip irrigation systems are highly effective, delivering water directly to roots.
- If watering manually, use a gentle spray nozzle to avoid washing soil away.
- Check soil daily in hot weather, as vertical gardens tend to dry quickly.
Fertilization
- Use a balanced liquid fertilizer every 2–3 weeks.
- Organic compost tea is a great alternative for herbs and leafy greens.
Maintenance
- Trim overgrown herbs regularly to encourage new growth.
- Replace weak or struggling plants promptly to keep the pallet lush.
- Inspect the pallet for wood rot or loose nails every few months.
Pest Control
- Companion planting can help; for example, marigolds deter common pests.
- Neem oil spray or insecticidal soap works well for most infestations.
This kind of upkeep is very similar to what’s needed in other compact systems, as discussed in our section on DIY hydroponic vertical gardens, where controlled watering plays the biggest role in plant health.
Safety, Cost, and Common Mistakes to Avoid

While pallet vertical gardens are inexpensive and creative, a few important considerations will help you avoid problems down the line.
Safety Concerns
- Always confirm that the pallet is heat-treated (HT) and not chemically treated.
- Avoid using old pallets that may have carried chemicals or spills.
- If placing indoors, line the pallet to prevent leaks and mold.
Cost Breakdown
- Most pallets can be sourced for free from warehouses or stores.
- Expect small expenses for soil, landscape fabric, and plants — usually under $30–$50 depending on size.
- Optional extras like drip irrigation or decorative finishes may add to the cost.
Common Mistakes to Avoid
- Using heavy, deep-rooted plants that the pallet cannot support.
- Skipping the step of keeping the pallet flat for root establishment.
- Neglecting waterproof lining if the pallet leans against a wall.
- Overwatering, which leads to soil erosion and fungal growth.
Many of these issues are shared with other vertical gardening approaches. As explained in our overview of beginner vertical gardening mistakes, choosing the wrong plants or skipping preparation steps are the most common reasons projects fail.
FAQs About Pallet Vertical Gardens
1. How to make a simple vertical garden?
A simple vertical garden can be made with a single wooden pallet, landscape fabric, soil, and a selection of small plants like herbs or flowers. By securing the fabric to the back and sides, filling it with soil, and planting seedlings in the gaps, you can create a functional and decorative garden wall in just a few steps.
2. What is the cheapest way to make a garden?
The most affordable option is to repurpose materials you already have — such as wooden pallets, plastic bottles, or old crates. Seeds instead of seedlings also reduce costs, while homemade compost can replace expensive fertilizers.
3. What are the disadvantages of vertical gardens?
Vertical gardens dry out faster than traditional beds due to limited soil, requiring more frequent watering. They may also have weight limitations and need structural support. Additionally, not all plants thrive in shallow soil spaces.
4. How much does it cost to install a vertical garden?
A DIY pallet vertical garden can cost as little as $30–$50, depending on whether you source pallets for free. Professional installations with automated irrigation systems, however, can range from $500 to several thousand dollars.
5. What materials do you need for a vertical garden?
The essentials include a pallet or frame, landscape fabric, potting soil, and your choice of plants. Optional materials are plastic liners, drip irrigation tubing, and eco-friendly wood sealant for longer durability.
6. What is a vertical garden called?
Vertical gardens are often called “living walls” or “green walls” when they cover large structures. Smaller DIY versions, like pallet gardens, are sometimes referred to as vertical planters or vertical green systems.